Performs fusion of a Panchromatic and a Multispectral image with 18 pansharpening algorithms.
State-of-the-art fusion methods are included, such as BDSD, GSA, ATWT, SFIM, MTF_GLP_CBD and HCS.
Contents:
Download | Screenshots | Program Description | What is Pansharpening? | Usage | Notes | How to cite | Acknowledgement
This application is portable: it does not need installation.
Just download it, extract the zipped folder, copy it wherever you like and run the executable.
Windows ![]()
Download PanFusion (v. 2.4) for Windows:

Compatible with Windows 7, 8.x, 10. 64-bits exclusive.
Download PanFusion CLI version (v. 3.6) for Windows
The above version works with terminal commands only (no GUI). It was created for iteratively processing large amount of images with various algorithms. Special thanks go to Marjan Faraji, for requesting this type of functionality.
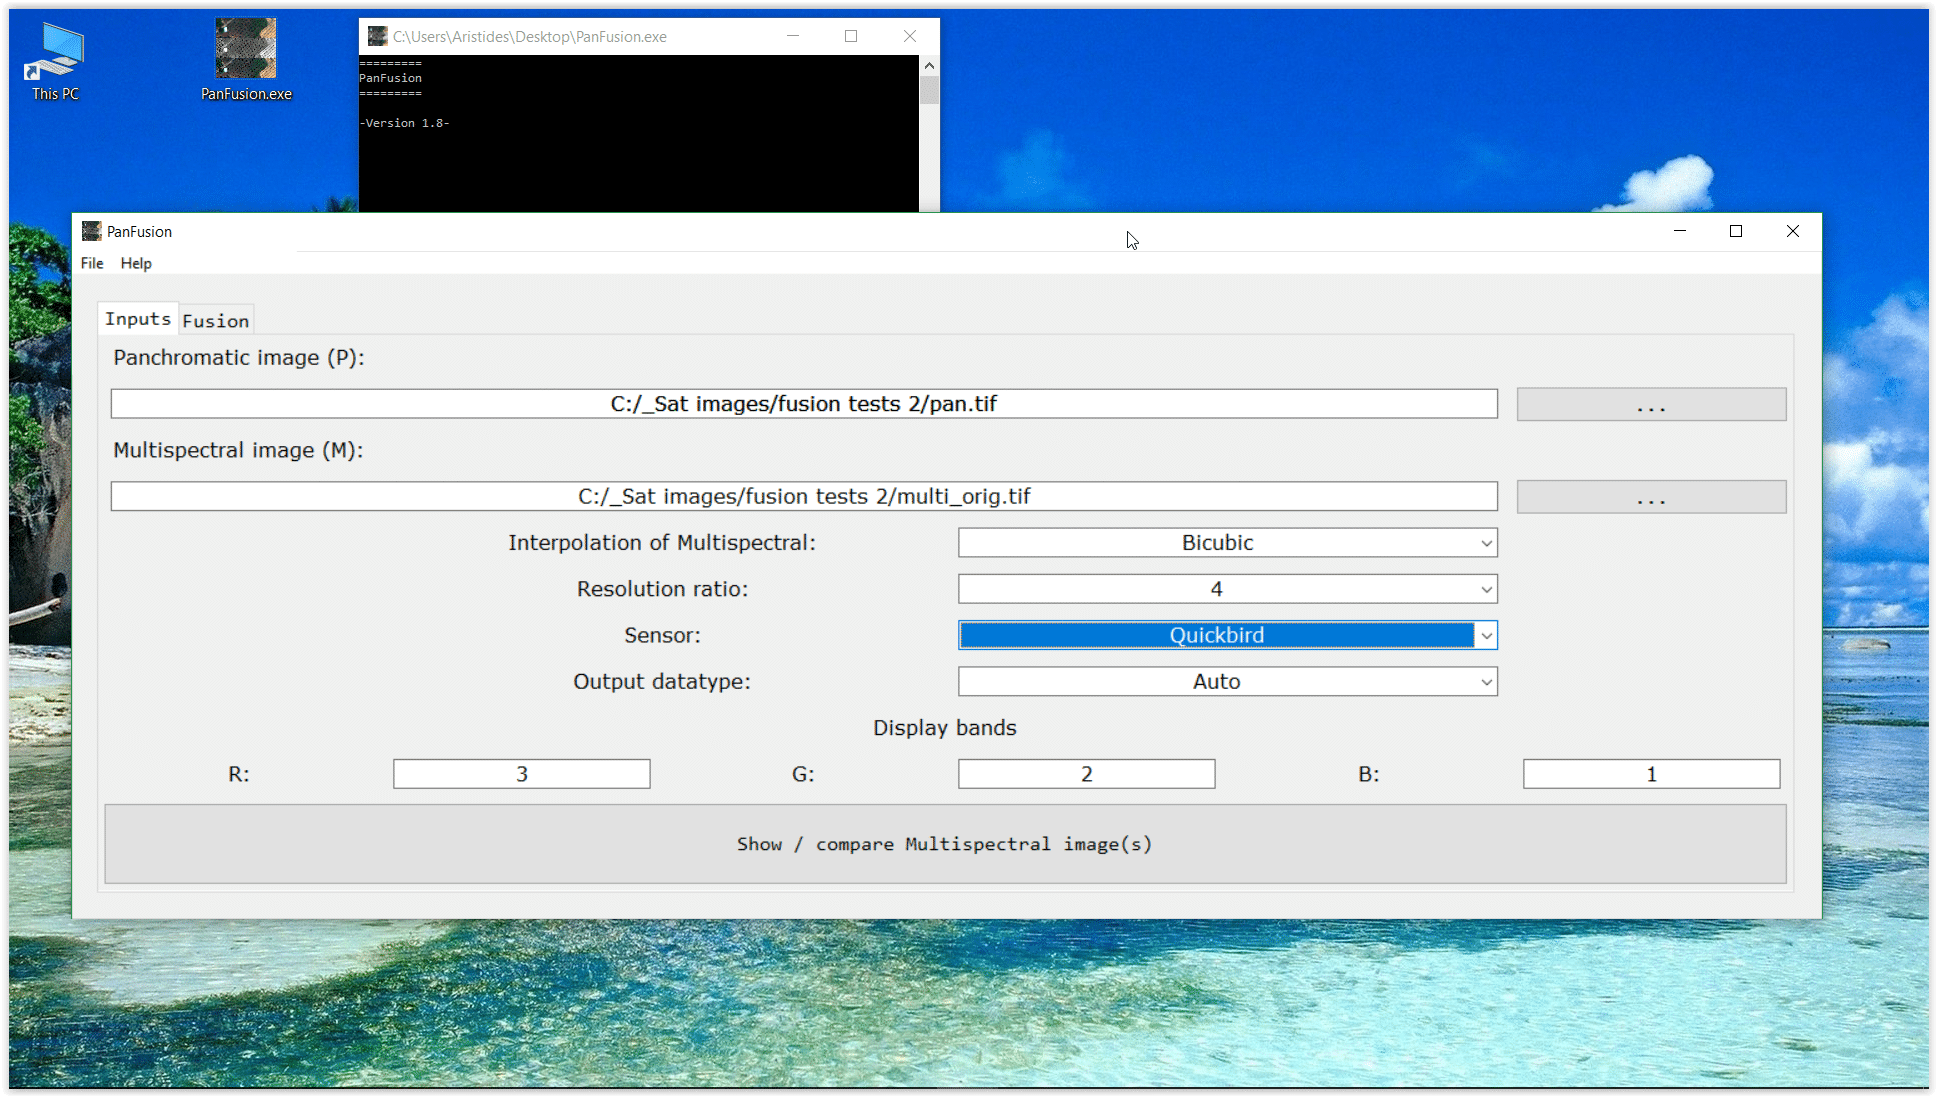
Figure 1: Running PanFusion on Windows 10. User has completed the input of the imagery and pansharpening parameters (interpolation method, resolution ratio, sensor).
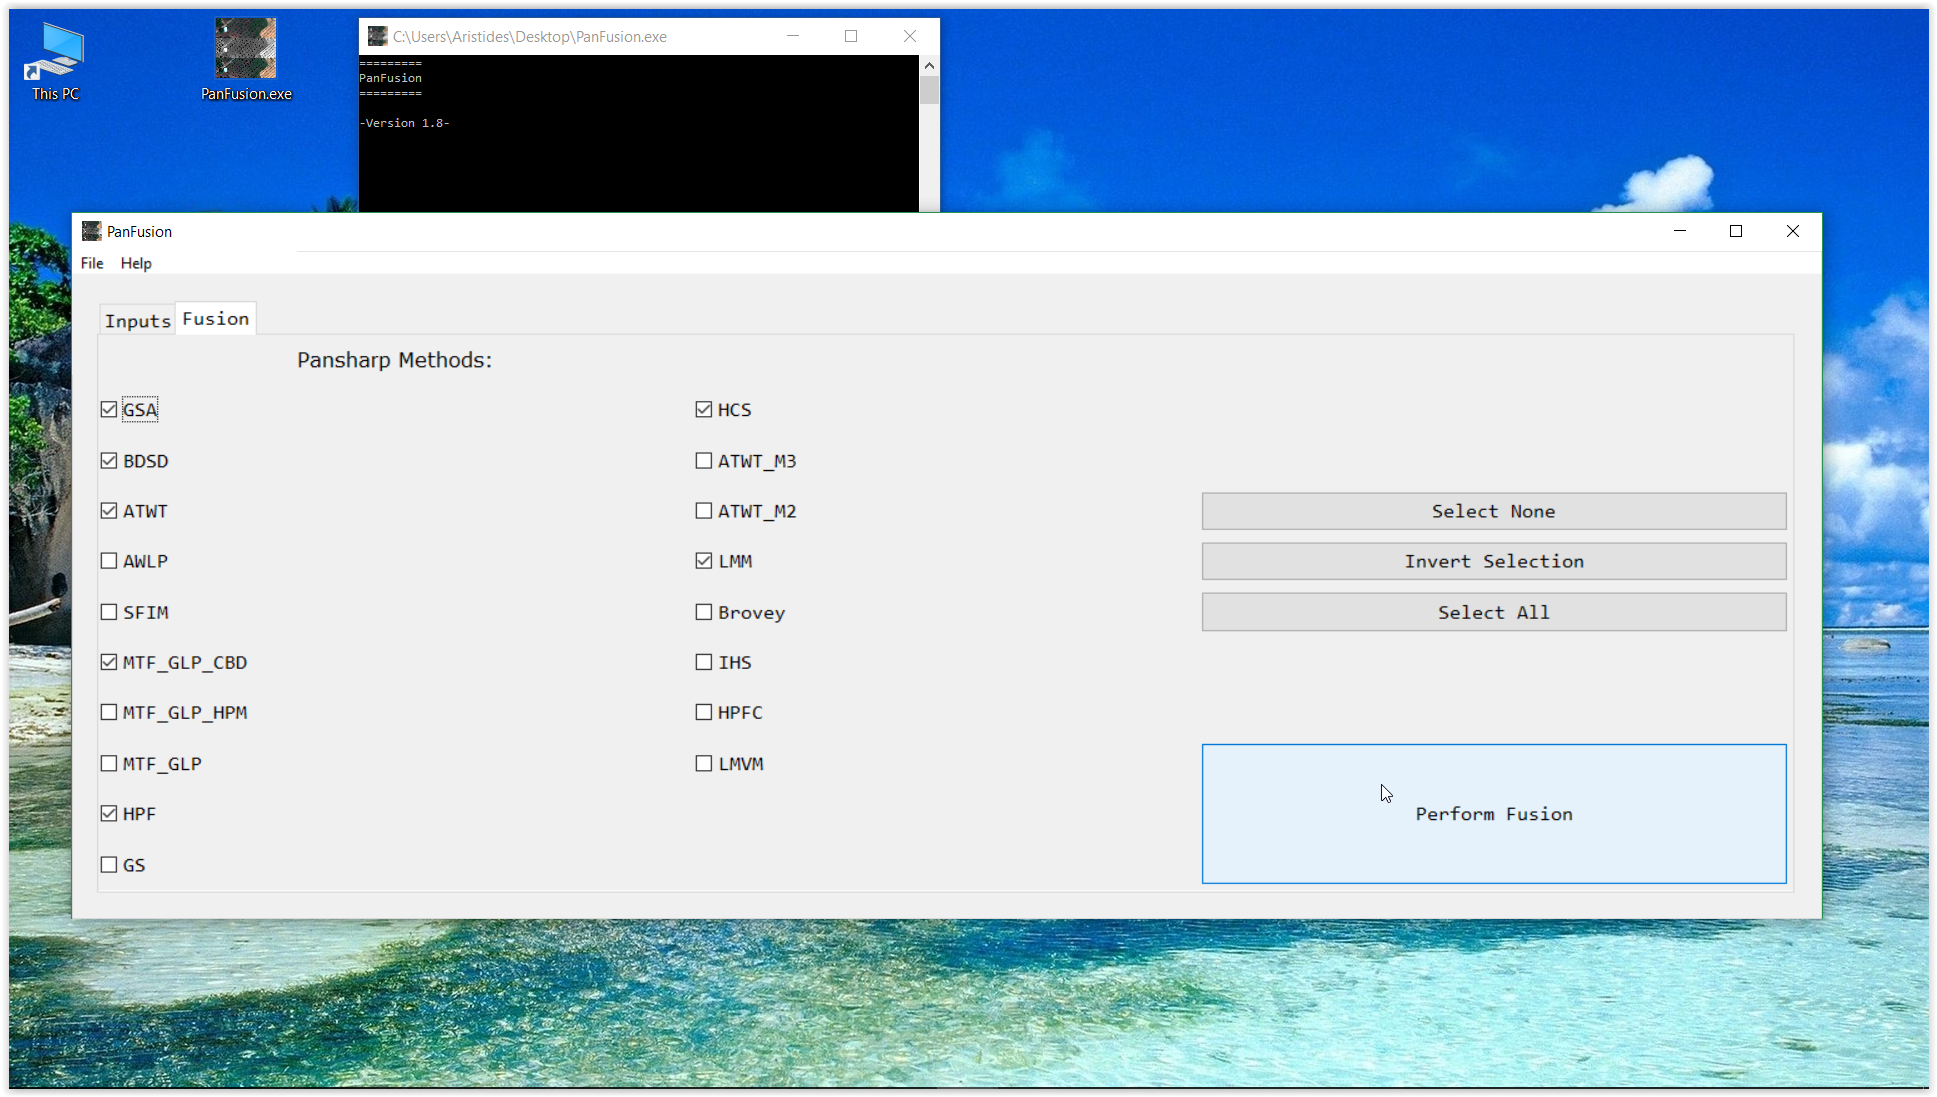
Figure 2: Running PanFusion on Windows 10. After completing the input tab, user has selected some fusion methods. The images are now ready for pansharpening. This can be accomplished by pressing the “Perform Fusion” button.
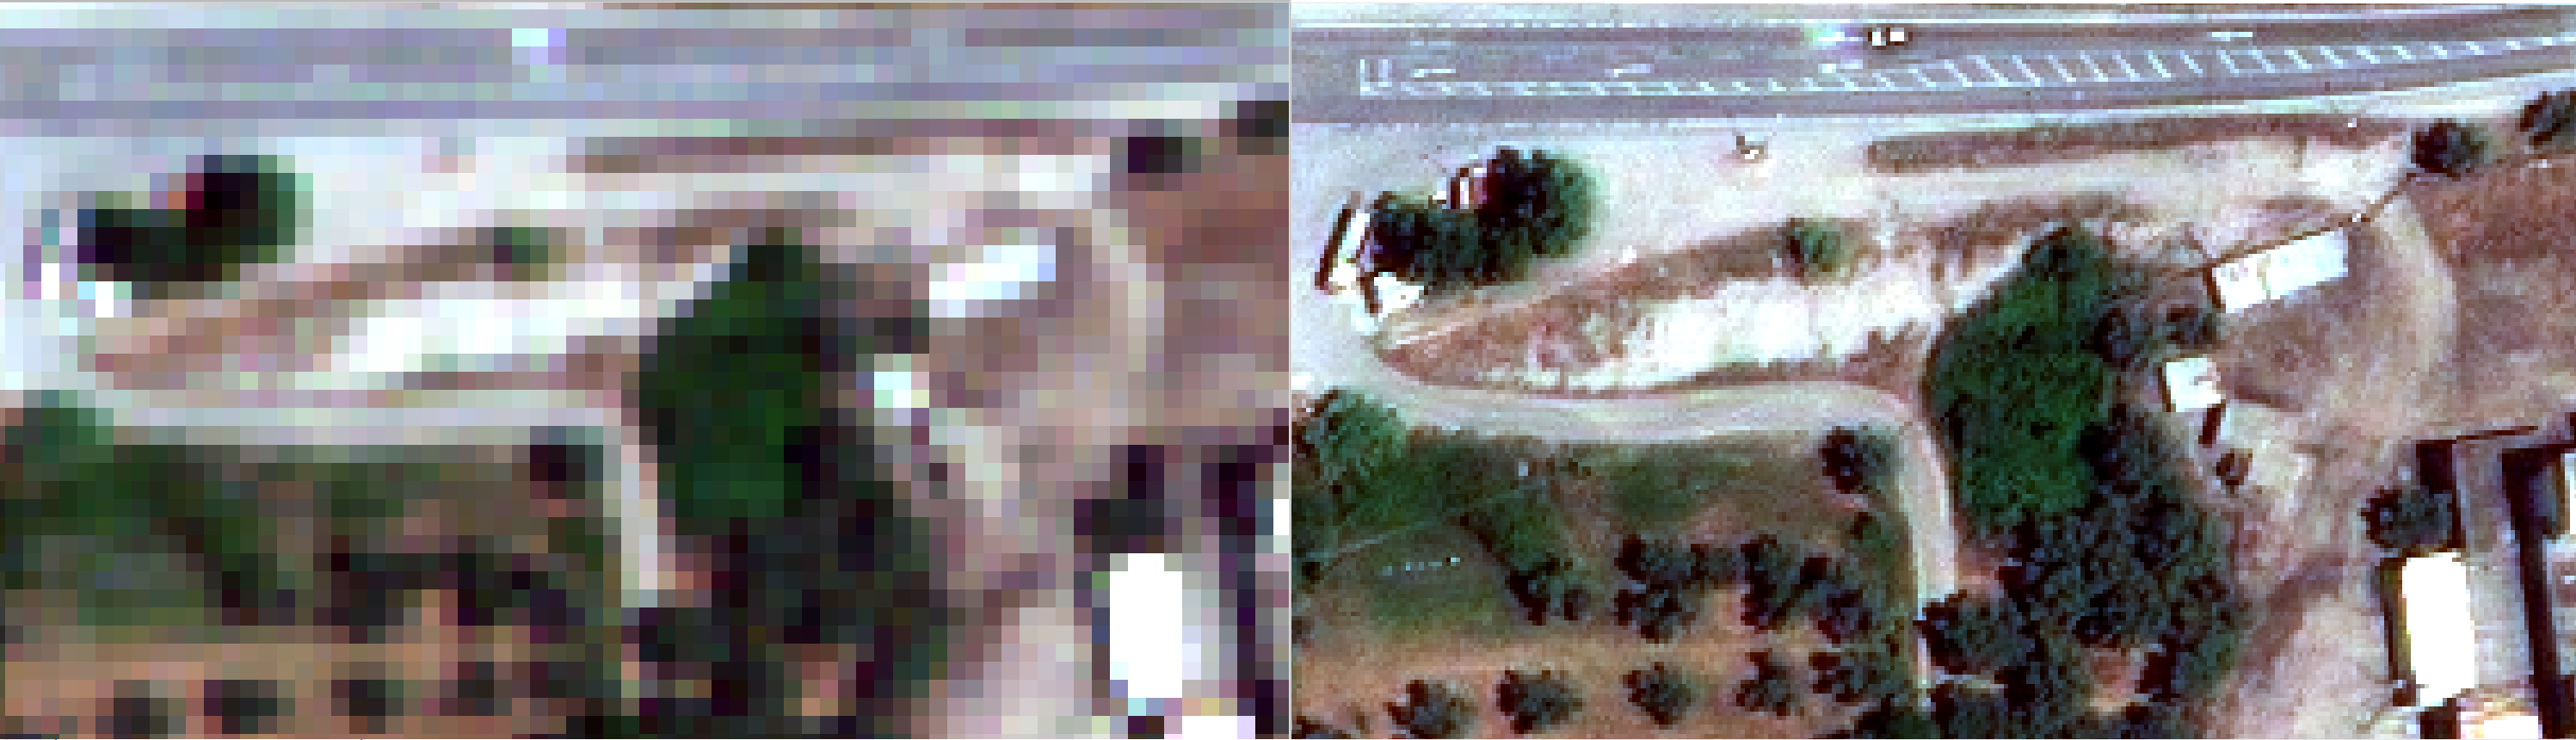
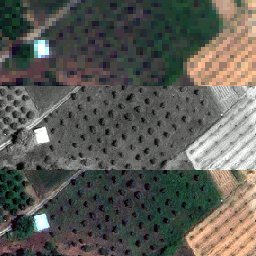
Figure 3: Pansharpening GeoEye-1. Right: Multispectral image. Left: HCS fused image.
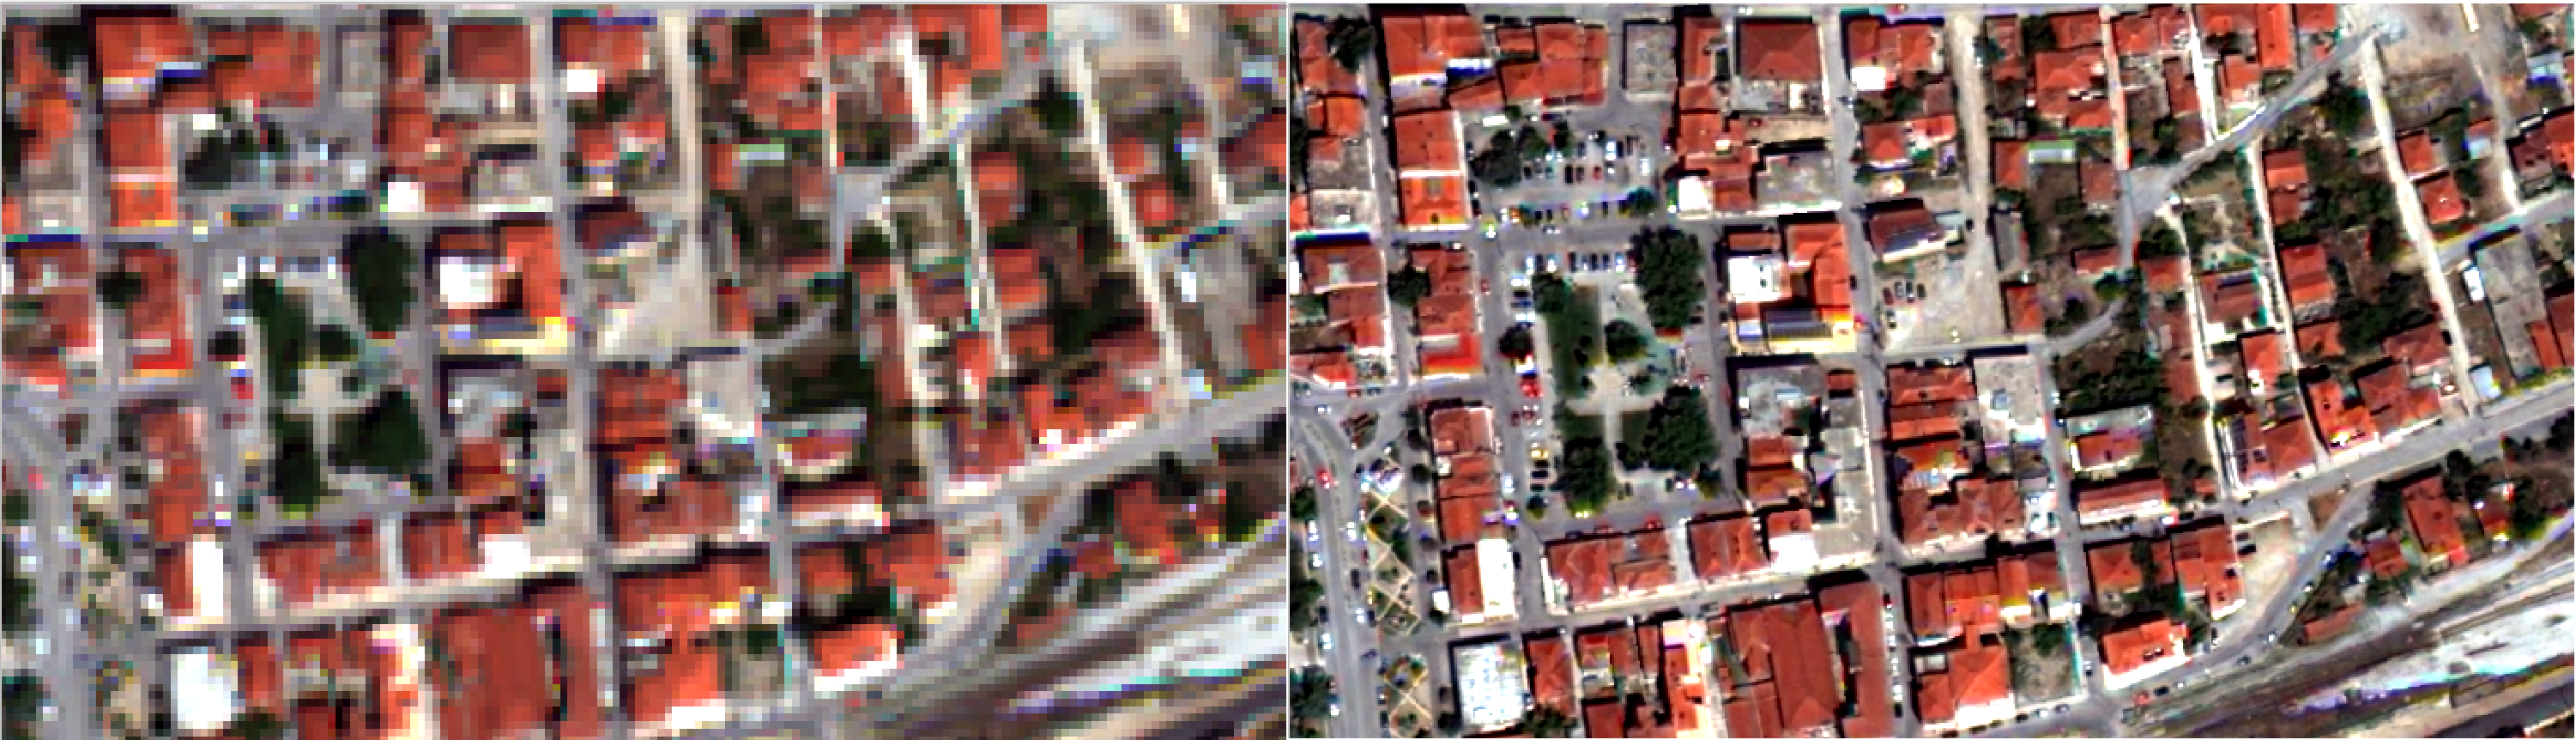
Figure 4: Pansharpening WorldView-2. Right: Multispectral image. Left: BDSD fused image.
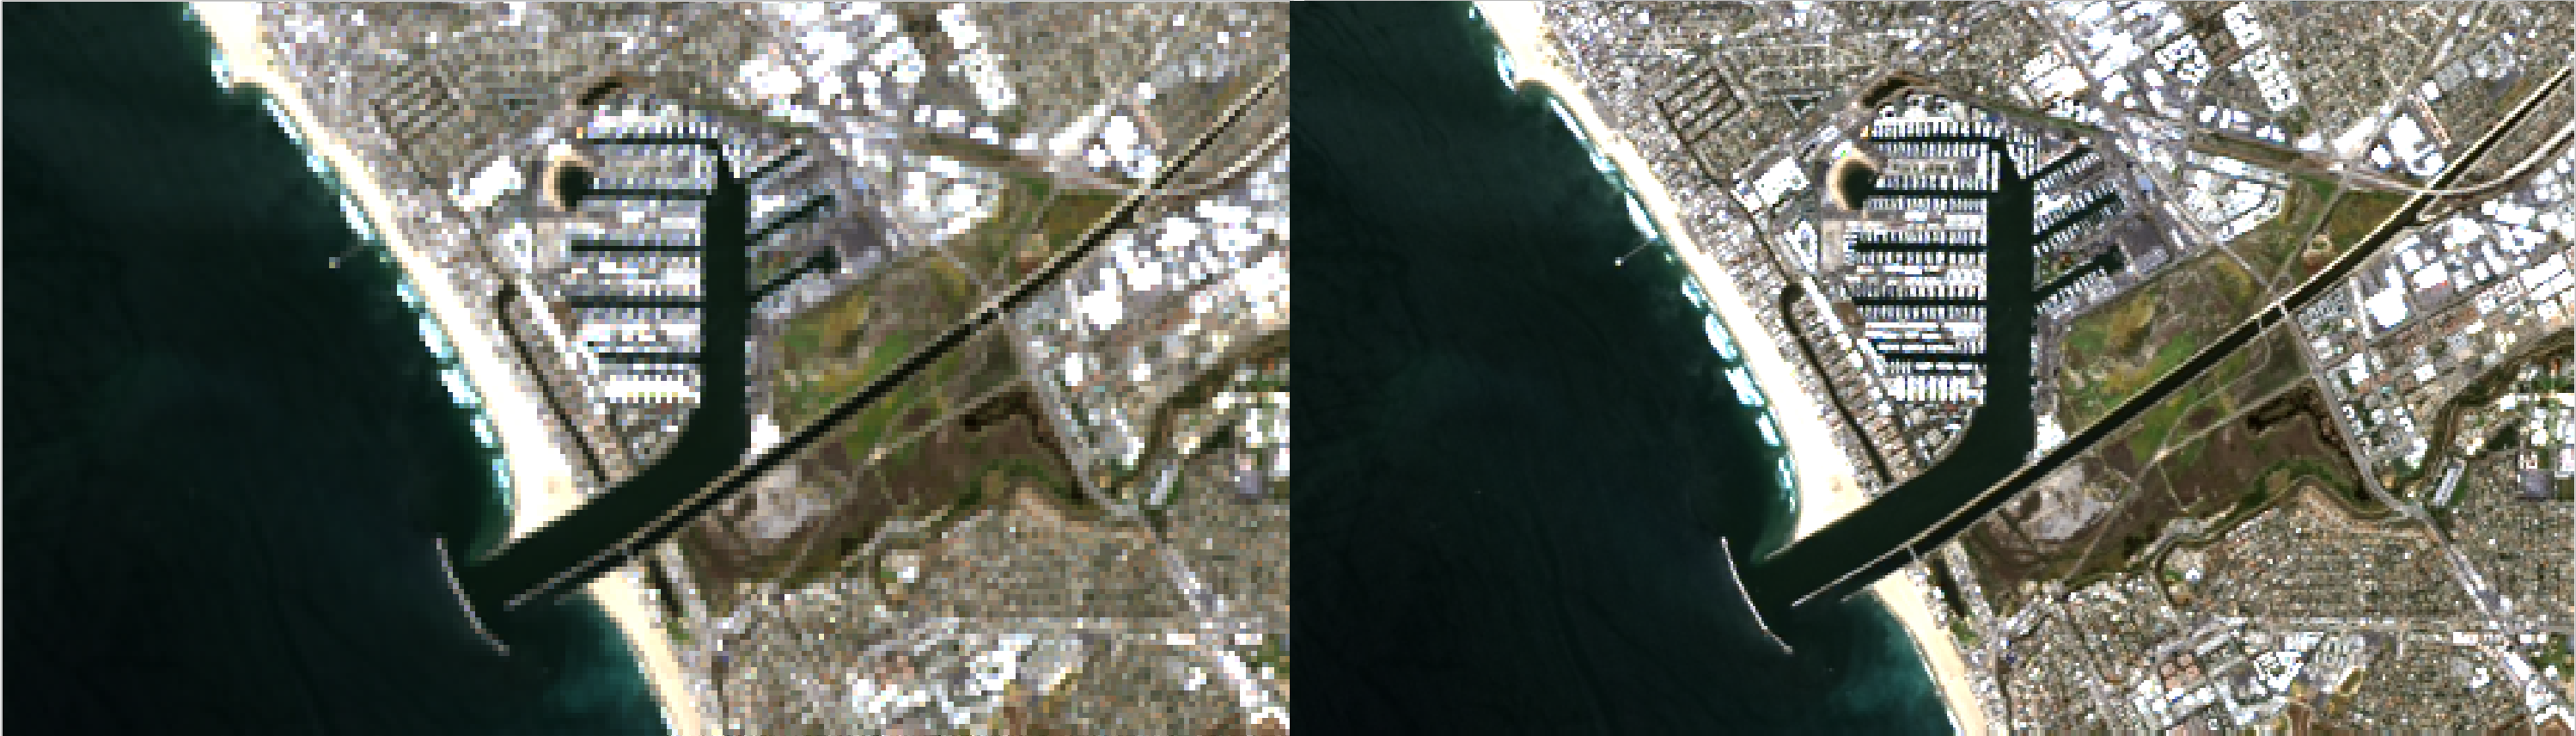
Figure 5: Pansharpening Landsat-8. Right: Multispectral image. Left: GSA fused image.
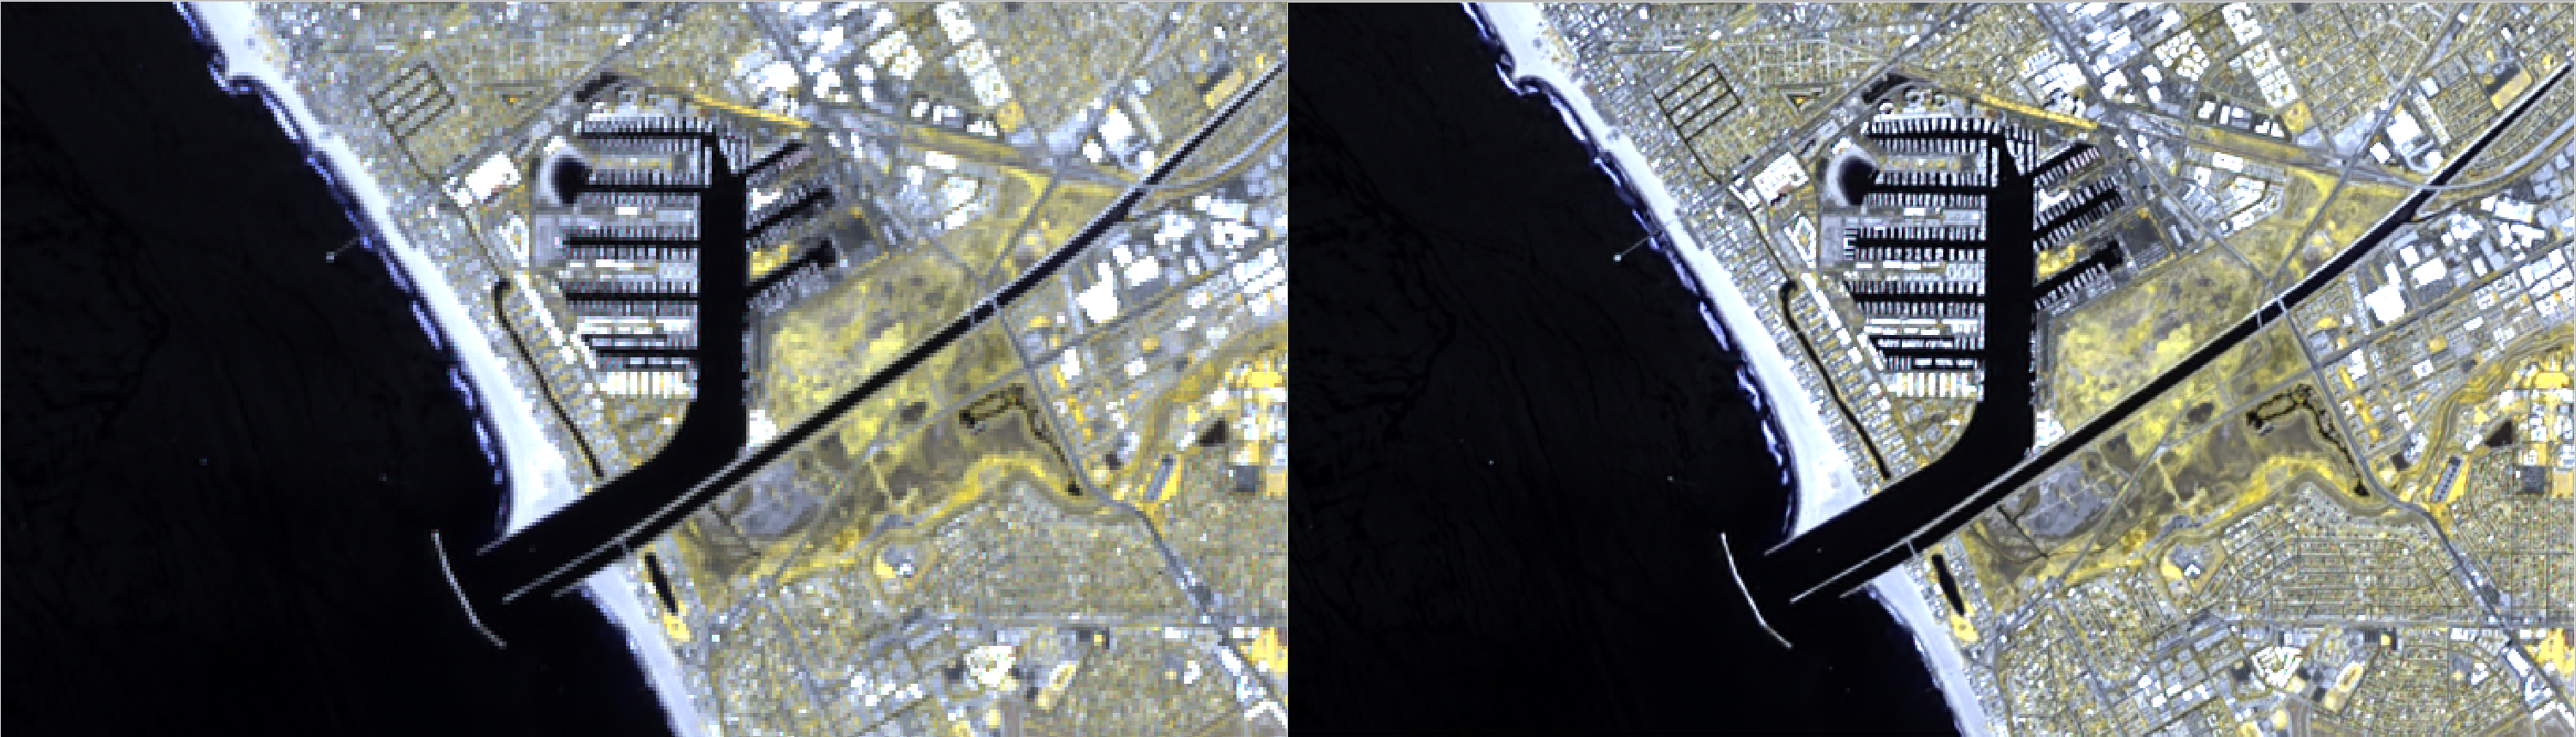
Figure 6: Pansharpening Sentinel-2. Right: Multispectral image. Left: MTF_GLP_CBD fused image.

Figure 7: Visual comparison of two WorldView-2 images, pansharpened with Panfusion. The application links the two viewers automatically. When the user pans or zooms the image in the left window, the exact same area is shown in the right window.
Fun fact: this is a portion of two 12000x12000x8 WorldView-2 images (144 Megapixels * 8 = 1.152 billion pixels), having a size of 2.14 Gb, each (!) [uncompressed tiff format]. To show each image, I waited ~1 min on my i7 machine, but afterwards the pan/zoom operations were performed almost instantly.
PanFusion is a program designed for Image Pansharpening.
It is a free, fast, user-friendly application.
It can perform fusion of a Panchromatic and a Multispectral image with 18 pansharpening algorithms.
State-of-the-art fusion methods are available, such as BDSD, GSA, ATWT, SFIM, MTF_GLP_CBD and HCS.
As a complementary feature, it can visualize and link 2 multispectral images for rapid visual inspection and comparison.
Pansharpening is an image processing technique, where a low resolution colorful image (Multispectral) is combined with a high resolution grayscale image (Panchromatic), to produce a new fused (Pansharpened) image. The Pansharpened image has the spatial resolution of the Panchromatic and the spectral (color) resolution of the Multispectral image. In other words, using the Panchromatic (Pan), the resolution of the Multispectral image is improved (sharpened), thus the name Pan-sharpening.
1) Input the full path of the Panchromatic and Multispectral images you want to fuse. To do this, you can click the respective ‘…’ button and locate the image using the new window that will appear. Another faster way is to simply drag and drop the images from the file explorer to their respective path box.
2) Determine the fusion parameters. Select the desired interpolation method, the resolution ratio (how many times the resolution of the Pan is bigger than the Multi) and the sensor (Satellite). If the sensor you are using is not included in the options box, leave the default value (Generic). You can also change the output datatype. For most cases it is best to leave the default value (Auto).
3) Click on the “Fusion” tab and select the Pansharpening methods you want to perform. When finished selecting, click the “Perform Fusion” button to begin pansharpening your images.
4) That’s it! Now all you have to do is wait until the processes are completed. When the program has completed all fusion methods, you will be notified from the console window. You can now go back on the inputs tab and view some of the pansharpened images the application has just created. Or you can select some other methods and perform a new fusion.
1) When the application has finished with the image fusion process, all pansharpened images will be written to the folder of the Multispectral image. All fused images have an automatic prefix, according to the method and the original multispectral name. For example, if you choose the HPF method and you have a multispectral image named ‘multi.tif’, then the fused image will be named ‘HPF_multi.tif’.
2) An .xls file is written after fusion completion, named ‘Fusion_times.xls’. This file contains the time required for performing each pansharpening method. The file is placed in the same folder with the Multispectral and the Pansharpened images.
Vaiopoulos, A. D. and Karantzalos, K.: PANSHARPENING ON THE NARROW VNIR AND SWIR SPECTRAL BANDS OF SENTINEL-2, Int. Arch. Photogramm. Remote Sens. Spatial Inf. Sci., XLI-B7, 723–730, https://doi.org/10.5194/isprs-archives-XLI-B7-723-2016, 2016.
Gemine Vivone, for providing Matlab code for most fusion methods.